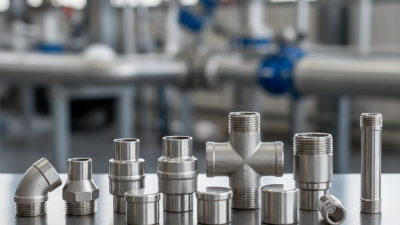
Choosing the right water fittings is a small decision with large consequences. A leaking elbow can stain a cabinet, waste water, and damage trust in an entire system. The United Nations World Water Development Report 2024 highlights growing pressure on water resources worldwide. Meanwhile, the U.S. Environmental Protection Agency estimates that household leaks waste nearly 1 trillion gallons annually in the United States.
Quality matters.
Water-materials researcher Dr. Andrew Whelton has repeatedly emphasized a practical principle: “What touches drinking water matters.” That idea should guide every fitting choice. Check potable-water approvals, pressure ratings, temperature limits, thread compatibility, seal materials, and corrosion resistance. NSF/ANSI 61 certification can help verify whether components are suitable for drinking-water contact. It is not a decorative label.
The ten essential tips in this guide connect technical evidence with real installation experience. Look closely at the fitting body, gasket, connection depth, and manufacturer traceability. A cheap fitting may appear efficient today. Later, it may loosen, crack, or contaminate water. I would not pretend that every failure is easy to predict. Installation quality, water chemistry, vibration, and maintenance also matter. Even experienced contractors can miss one weak connection behind a wall.
Choose carefully.
This introduction uses findings from the U.S. EPA WaterSense program, the United Nations World Water Development Report 2024, and NSF/ANSI 61 guidance. Together, they support a reliable approach to selecting water fittings: verify the evidence, match the application, and think beyond the purchase price.
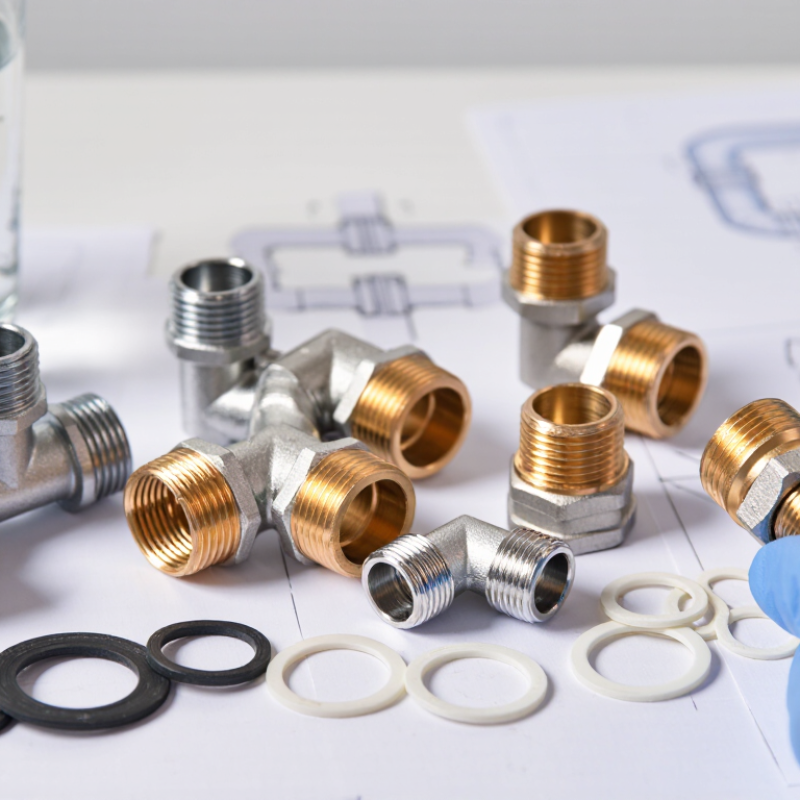
Choosing water fittings starts with understanding the system, not browsing shapes and finishes. Check pipe material, diameter, operating pressure, water temperature, and connection type. A kitchen supply line may need different fittings from a garden system or hot-water outlet. Measure twice. A small mismatch can cause leaks, noise, or poor flow.
Tip: Record real usage conditions. Note whether the fitting serves drinking water, irrigation, heating, or wastewater. Hard water, chlorine, outdoor sunlight, and freezing temperatures can affect material performance. In homes with fluctuating pressure, select fittings rated above the normal working range. A pressure gauge provides useful evidence, although many people skip this simple check.
Tip: Consider access and maintenance. A fitting hidden behind a cabinet should allow inspection and replacement. Leave enough space for a wrench, and avoid forcing a connection into alignment. I have seen rushed installations fail because the pipe carried stress. That mistake is easy to prevent, but not always noticed immediately.
Review installation instructions and applicable plumbing standards before purchasing. For drinking-water systems, confirm that materials are approved for potable use in your area. If the water quality or pressure is uncertain, ask a qualified plumbing professional to test it. My own first choice is not always perfect; site conditions can change the answer. Reliable selection comes from measured requirements, careful compatibility checks, and honest attention to future use.
Compare representative operating conditions before selecting water fittings. Pressure, temperature, water quality, connection size, and installation environment should all match the fitting specification.
These representative conditions illustrate common residential and light-commercial applications. Always verify actual system pressure, temperature, fluid chemistry, and local plumbing requirements before installation.
10 Essential Tips for Choosing Water Fittings
Choose Suitable Fitting Materials for Water Quality and Environment
Material matters. Begin with the water, not the fitting price. Test pH, hardness, chloride, temperature, disinfectant levels, and sediment before selecting materials. Hard water can leave scale inside narrow passages. Chloride-rich water may accelerate corrosion in vulnerable alloys. Water treatment also changes material performance over time.
The WHO and UNICEF Joint Monitoring Programme reported that 2.2 billion people lacked safely managed drinking water in 2022. This highlights why contamination control cannot be treated as a minor detail. Choose fittings certified for potable-water contact under recognized requirements, such as NSF/ANSI/CAN 61 or an equivalent national standard. For hot water, confirm the rated temperature and pressure. A cold-water fitting may fail quietly when exposed to repeated heating cycles.
Consider the environment around the installation. Coastal air, buried soil, ultraviolet exposure, and freezing conditions can each influence material life. Stainless steel, copper alloys, engineered plastics, and other options perform differently across these settings. Check compatibility between the fitting, pipe, seal, and water chemistry. Mixed metals can create galvanic corrosion.
A perfect choice is rare. I would not trust a general material chart without site data. Recheck the water after treatment changes. The U.S. Environmental Protection Agency’s corrosion-control guidance emphasizes monitoring conditions that affect lead and copper release. Small oversights, such as a degraded seal or trapped sediment, can undermine an otherwise sound installation.
Choosing water fittings starts with measurements, not guesswork. Measure the pipe’s outside diameter. Confirm its nominal size and wall thickness. Match the connection type: threaded, compression, soldered, or push-fit. Identify the thread standard, such as NPT or BSP. They are not interchangeable. Check the sealing method. A gasket, O-ring, or thread sealant needs the correct mating surface.
Read the fitting’s pressure rating at the actual water temperature. Ratings often decrease as temperature rises. Check the system’s maximum pressure, including pump surges. The ASME B16.5 pressure-temperature tables provide a useful engineering reference. Do not rely on appearance. I once treated a matching thread as proof of compatibility. It was not. Use a pressure gauge and test every joint slowly after installation.
Material compatibility also matters. Avoid unsuitable combinations that may encourage corrosion or chemical degradation. For drinking-water systems, verify compliance with NSF/ANSI/CAN 61 or the applicable local standard. The U.S. Environmental Protection Agency’s WaterSense leak guidance reports that household leaks can waste nearly 10,000 gallons yearly. Small fitting failures become expensive quickly. The WHO/UNICEF Joint Monitoring Programme’s 2024 update reported that 2.2 billion people lacked safely managed drinking water in 2022. That figure reinforces the need for certified materials and clean installation practices. Leave room for inspection. A tight space can make a correct fitting difficult to maintain.
Choosing water fittings begins with the standard, not the price tag. For drinking-water systems, check compliance with NSF/ANSI/CAN 61 or an equivalent national requirement. This standard controls material safety when components contact potable water. Certification must match the fitting’s actual use, temperature, and pressure range. A familiar certification mark is not enough.
Look for test evidence.
The WHO/UNICEF Joint Monitoring Programme reported that 2.2 billion people lacked safely managed drinking water in 2022. That figure reinforces the importance of contamination control at every connection. Check the certificate number, testing body, and production date. Request technical sheets when information looks vague. Local plumbing codes still matter, even when an international standard appears acceptable.
Durability requires more than a thick-looking wall. Compare pressure ratings, temperature limits, corrosion resistance, and repeated pressure-cycle testing. Examine threads under bright light. They should be clean, even, and free from burrs. Inspect the sealing surface and O-ring for cuts or flattening.
The U.S. Environmental Protection Agency estimates household leaks can waste nearly 1 trillion gallons of water annually in the United States. Leak resistance deserves serious attention.
Installers should perform a pressure test before covering joints. A dry paper towel around each connection can reveal slow seepage. I have learned that “leak-free” claims can be too broad. Vibration, poor alignment, and over-tightening still create failures. A careful inspection often catches what a certificate cannot.
Choosing water fittings requires more than matching thread sizes. Installation, maintenance, replacement, and lifetime cost should guide every decision. I once chose the lowest quote; that was shortsighted. A cheaper fitting later required wall access and extra labor.
Tip 1: Map pipe routes before buying. Tip 2: Check pressure, temperature, and water chemistry. Tip 3: Confirm measurements twice. Tip 4: Leave service access around valves. The U.S. EPA WaterSense program reports that household leaks can waste over 10,000 gallons yearly. Small drips deserve attention.
Tip 5: Select durable materials suitable for the application. Tip 6: Record fitting locations and installation dates. Tip 7: Inspect joints during seasonal maintenance. Tip 8: Replace worn seals early. EPA WaterSense estimates that 10% of homes have leaks wasting at least 90 gallons daily. That makes preventive inspection financially sensible.
Tip 9: Compare labor, tools, access, and disposal costs, not only purchase price. Tip 10: Keep compatible replacement parts available. The U.S. EPA’s 2023 Drinking Water Infrastructure Needs Survey estimates $625 billion in drinking-water investment over 20 years. That figure shows why repairability and service life matter. I still review the plan after installation; real spaces often expose mistakes that drawings miss.
| Tip | Selection Dimension | What to Check Before Purchase | Practical Guidance | Maintenance and Replacement Impact | Long-Term Cost Consideration |
|---|---|---|---|---|---|
| 1 | Confirm Pipe Size and Connection Type | Measure the pipe outside diameter or identify the nominal pipe size. Confirm whether the connection is threaded, compression, press-fit, soldered, solvent-welded, or push-fit. | Do not match fittings by appearance alone. A fitting must match both the pipe material and the connection system. | Correctly matched connections reduce leaks and make future repairs easier because replacement parts remain compatible. | Adapters and reducers can increase labor, space requirements, and the number of potential leak points. |
| 2 | Select a Suitable Material | Compare copper, stainless steel, brass, PEX, CPVC, or other approved materials according to water chemistry, temperature, pressure, and installation conditions. | Use only materials approved for potable water where drinking water is involved. Avoid mixing incompatible metals without suitable dielectric protection. | Material compatibility helps limit corrosion, dezincification, scale buildup, and premature fitting failure. | Purchase price is only one factor; service life, labor time, corrosion risk, and accessibility strongly affect total cost. |
| 3 | Check Pressure and Temperature Ratings | Review the fitting’s maximum working pressure and allowable temperature for the intended water system. | Use the lowest-rated component in the assembly as the practical system limit. Hot-water installations require fittings specifically rated for elevated temperatures. | Operating outside the rating can accelerate deformation, seal deterioration, and sudden leakage. | A higher-rated fitting may cost more initially but can reduce replacement frequency in demanding applications. |
| 4 | Verify Potable-Water Compliance | Look for documentation showing that the material and fitting are approved for the intended drinking-water application under the applicable local regulations. | Confirm requirements for lead content, drinking-water contact, building codes, and installation location before ordering. | Compliant components are easier to document, service, and replace during inspections or property renovations. | Non-compliant products can create replacement, testing, remediation, and regulatory costs that exceed the original savings. |
| 5 | Plan the Layout and Access | Map pipe routes, isolation valves, access panels, clearances, bends, drains, and support points before installation. | Place shutoff valves where they can be reached without removing walls, cabinets, or equipment. Keep serviceable joints accessible whenever possible. | Good access allows inspection and repair without extensive demolition or disruption to water service. | Extra planning may slightly increase installation time but can substantially reduce future labor and property-repair costs. |
| 6 | Choose the Correct Sealing Method | Determine whether the joint requires an elastomeric seal, approved thread sealant, gasket, solder, press connection, or solvent cement. | Follow the fitting manufacturer’s installation method and use seal materials compatible with the water temperature and chemistry. | Incorrect sealant, damaged O-rings, over-tightened threads, and contaminated surfaces are common causes of leakage. | Using the correct joining method reduces callbacks, water damage, and premature replacement of otherwise serviceable fittings. |
| 7 | Account for Water Quality | Consider hardness, acidity, alkalinity, chloride content, sediment, and treatment chemicals in the local water supply. | Hard water can promote scale; aggressive or high-chloride water can increase corrosion risk in susceptible materials. Use filtration or treatment where appropriate. | Install accessible strainers or filters when sediment is present, and schedule periodic cleaning based on measured buildup. | Water treatment has an operating cost, but it may extend fitting life and reduce valve, aerator, and appliance maintenance. |
| 8 | Include Isolation and Drainage Points | Identify where the system can be shut off, drained, flushed, and tested by zone or fixture. | Use appropriately sized isolation valves and provide drain points in sections that may require winterizing, cleaning, or replacement. | Sectional isolation limits the affected area during repairs and makes planned maintenance safer and faster. | Additional valves add upfront material cost, but they can significantly reduce water loss, downtime, and emergency labor charges. |
| 9 | Set an Inspection and Maintenance Plan | Define inspection intervals for visible joints, valves, pressure regulators, filters, and areas exposed to vibration or freezing. | Inspect for moisture, corrosion, mineral deposits, discoloration, unusual noise, pressure changes, and difficult valve operation. | Early detection allows seals or individual fittings to be replaced before a small leak causes structural or equipment damage. | Routine inspection is usually less expensive than emergency water-damage restoration and unplanned system shutdowns. |
| 10 | Estimate Total Life-Cycle Cost | Compare purchase price, installation labor, tools, access work, maintenance, expected replacement, water loss, and disposal costs. | Use a simple life-cycle estimate: initial installation cost + maintenance cost + replacement cost + expected water-damage risk. | Keep records of fitting types, sizes, installation dates, pressure conditions, and repairs to support accurate future replacement decisions. | The lowest upfront price is not always the lowest total cost; durability, accessibility, compatibility, and service availability should be evaluated together. |
By continuing to browse or by clicking “Accept All Cookies,” you agree to the storing of first- and third-party cookies on your device to enhance site navigation, analyze site usage, and assist in our marketing efforts. View our Privacy and Cookie Policy.