How to Choose the Right Neon LED Strip for Your Project?

Choosing the right Neon Led Strip is not simply a matter of selecting the brightest product. Your project may need flexible curves, clean architectural lines, outdoor durability, or a soft glow behind translucent acrylic. Each requirement changes the specification. A strip that looks excellent in a showroom can disappoint when installed beneath a kitchen cabinet or around a tight sign corner.

Lighting engineer Sarah Chen explains, “The best Neon Led Strip disappears into the design while making the intended feature impossible to miss.” This principle keeps selection practical. Examine brightness, color temperature, voltage, power consumption, bending direction, and diffuser quality. Also check the IP rating, especially for bathrooms, gardens, storefronts, and exposed façades. IP65 may resist water spray, while submerged applications require a more suitable rating. Product labels alone are not enough.

Measure the installation path carefully. Leave room for connectors, power supplies, ventilation, and maintenance access. A twelve-volt system may suit short runs, while twenty-four volts often reduces voltage drop across longer sections. Test a sample before ordering hundreds of meters. Small details matter.

Do not chase maximum brightness.

In my experience, many failures begin with an attractive photograph and an incomplete specification. Color can shift against painted walls. Adhesive can weaken on dusty surfaces. Even a premium strip can perform poorly with an undersized driver. The selection process deserves a little hesitation. Recheck the environment, viewing distance, control method, and expected operating hours. A reliable Neon Led Strip should look right, install safely, and continue performing after the first impressive evening.
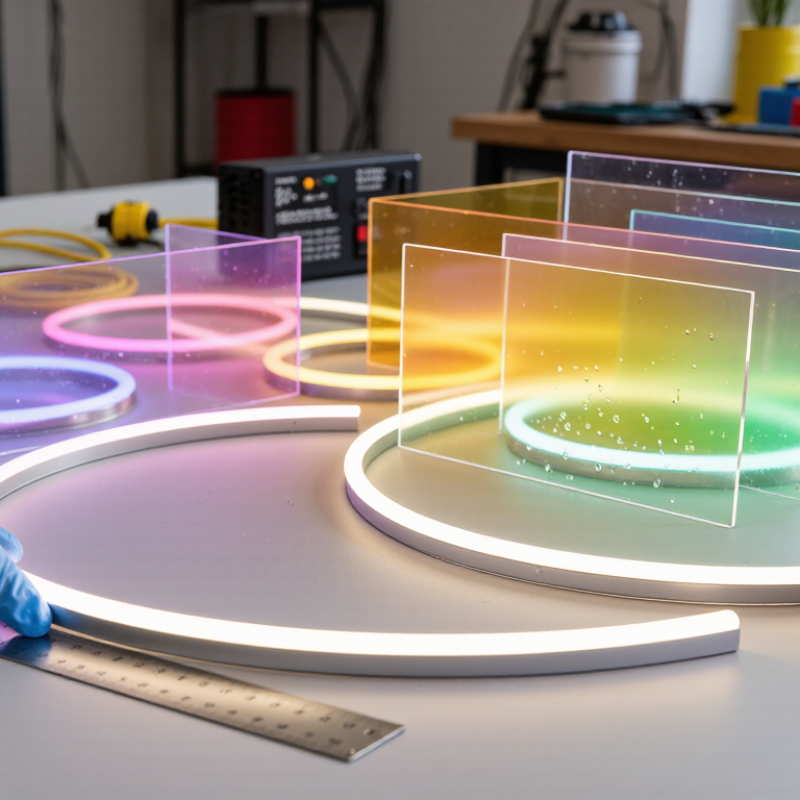
How to Choose the Right Neon LED Strip for Your Project?

Define Your Project’s Lighting Goals and Installation Requirements

Choosing a neon LED strip starts with defining the lighting goal. Is it for signage, task lighting, architectural edging, or a soft decorative glow? Each purpose needs a different brightness, color temperature, and diffusion level. The International Energy Agency reported that lighting uses about 15% of global electricity. Efficient LEDs matter, but energy efficiency alone cannot fix poor planning. A strip that looks vivid in a showroom may feel harsh in a small room.

Installation conditions are equally important. Measure the full route, including corners, joins, and concealed sections. For long runs, 24-volt systems usually reduce voltage drop compared with 12-volt options. Heat still matters. The U.S. Department of Energy notes that LED products often reach 25,000 to 50,000 hours, but real service life depends on temperature, drivers, and installation quality. I have seen elegant projects fail because the strip was tightly enclosed. That mistake is easy to repeat.

Tips: Select an IP rating under IEC 60529 for the actual environment. IP20 suits dry interiors, while damp areas may require IP65 or higher. Check the stated bend radius before forming curves. Leave access for the power supply. Do not rely only on wattage; review lumens per meter, color consistency, and maximum run length. A small sample test is worthwhile, even when the specification sheet looks convincing. Sometimes the “perfect” color becomes disappointing beside painted walls.

Compare Neon LED Strip Types, Profiles, and Lighting Effects

Choosing the right neon LED strip starts with the lighting effect you need. Static white strips suit clean architectural lines, while RGB strips create changing colors for entertainment areas. RGBW versions add a dedicated white channel, producing more natural warm or cool tones. Addressable strips can control individual sections, but they require compatible controllers and careful programming.

The profile matters as much as the LEDs. Top-bend neon follows straight runs and gentle curves across walls or ceilings. Side-bend models work better around columns, signs, and narrow edges. Round profiles create soft outlines, while flat profiles provide a wider visual surface. Check the bending direction before ordering. I once measured only the length and ignored the curve, which caused an awkward installation.

Lighting quality depends on more than brightness. Look for high color rendering when the strip will illuminate artwork, retail displays, or food areas. A frosted silicone diffuser reduces visible LED points and creates a smoother glow. Warm white feels comfortable in bedrooms, while neutral white supports workspaces. Waterproof protection helps in damp locations, but it does not replace proper connectors and sealed joints. Long runs may suffer voltage drop, causing the far end to look dimmer. Use suitable power injection and confirm the controller’s load rating. Dimming should also be tested at low levels, because some systems flicker when adjusted gently.

Select the Correct Brightness, Color, and Color Temperature

Choosing the right neon LED strip starts with brightness, not appearance. A strip that looks impressive online may feel harsh in a small room. Check lumens per meter, then consider mounting height, diffuser depth, and nearby surfaces. For decorative edges, moderate brightness often works better. Task areas need stronger output and reliable dimming.

Color affects the project’s emotional tone. Red and amber attract attention, while blue can feel cooler and more distant. Green may suit outdoor themes, but it can look uneven on pale walls.

RGB strips provide flexibility, yet single-color strips usually deliver a cleaner, more consistent glow. Always inspect a lit sample before ordering. Screen colors can mislead.

Color temperature matters most with white neon lighting. Warm white, around 2700K to 3000K creates a relaxed hospitality feel. Neutral white, near 3500K to 4100K supports shops and work areas. Cool white, around 5000K to 6500K appears crisp but may feel clinical. I once chose cool white for a display and regretted it; the products looked less welcoming. That mistake taught me to test lighting at night, not only under showroom lamps. Check dimming behavior too. Some strips shift color slightly when dimmed. That small change can affect the entire installation.

Check Power, Voltage, Waterproofing, and Energy Efficiency

Choosing the right neon LED strip starts with its electrical requirements, not its color or shape. In my installation experience, power mistakes cause more failures than poor styling. Check the strip’s wattage per meter and multiply it by the planned length. Add a safety margin of about 20 percent for the power supply. This reduces heat and voltage drop.

Voltage must match the controller and power supply exactly. A long run may look dim near its far end. That usually indicates voltage loss. For larger projects, divide the strip into shorter sections or feed power from both ends. Test one meter before ordering the full length. Small tests prevent expensive changes.

Waterproofing depends on location, not appearance. Indoor cove lighting may need basic protection, while outdoor steps require stronger sealing against rain and dust. Check the protection rating and inspect connectors carefully. One weak joint can defeat a well-sealed strip. Energy efficiency also deserves attention. Compare lumens per watt, not wattage alone. A brighter strip may consume more power without improving the space. Use a dimmer when full brightness is unnecessary. It saves energy and can extend LED life. I have sometimes chosen excessive brightness, then reduced it later. That was avoidable.

How to Choose the Right Neon LED Strip for Your Project? - Check Power, Voltage, Waterproofing, and Energy Efficiency

Selection Factor Typical Options Recommended Choice Why It Matters
Operating Voltage 12 V DC, 24 V DC, or 48 V DC 24 V DC for most general installations Higher-voltage strips generally have lower voltage drop over long runs and can provide more consistent brightness.
Power Consumption 4–20 W/m, depending on LED density and brightness 8–14 W/m for accent lighting; 14–20 W/m for brighter signage Power consumption determines the required power-supply capacity, cable size, heat output, and running cost.
Power-Supply Capacity Rated strip power × total length Choose a supply rated for at least 120% of the calculated load Example: 10 m × 12 W/m = 120 W; select a power supply of at least 144 W with the correct output voltage.
Maximum Continuous Run Commonly 5–10 m per feed, depending on voltage and design Use parallel power feeds for longer installations Exceeding the recommended run length can cause dimming, color variation, and excess conductor heating.
Waterproofing Rating IP20, IP65, IP67, or IP68 IP65 for protected outdoor areas; IP67/IP68 for exposed or wet locations The rating indicates protection against dust and water. IP ratings should match the actual installation environment.
Waterproofing Trade-Off Non-waterproof, coated, or fully enclosed silicone housing Use the lowest rating that safely meets site conditions Additional silicone protection can reduce flexibility, increase size, and make heat dissipation more difficult.
Energy Efficiency Approximately 60–100 lm/W for many white LED systems Select the highest efficacy that meets the required brightness and color quality Higher efficacy produces more light per watt, reducing electricity use for the same illumination level.
LED Density Typically 60– neon-style LEDs per metre, depending on construction Choose higher density for smoother bends and more uniform illumination Higher density reduces visible bright and dark spots but may increase power consumption and heat.
Color and Control Single-color, tunable white, RGB, or addressable RGB Single-color for simple lighting; RGB or addressable RGB for dynamic effects RGB and addressable systems require compatible controllers and may draw different amounts of power by color and effect.
Bend Direction Top-bend, side-bend, or flexible 3D designs Match the bend type to the shape of the installation A top-bend strip should not be forced into a side-bend application because this can damage the PCB or silicone housing.
Minimum Bend Radius Often about 50–150 mm, depending on strip construction Follow the manufacturer’s specified radius; never make sharp folds Maintaining the bend radius helps prevent cracking, kinking, solder-joint stress, and uneven illumination.
Cutting and Connection Cut only at marked intervals; use sealed connectors or soldered joints Plan cuts, end caps, connectors, and injection points before installation Cutting outside marked points can disable sections, while unsealed joints can compromise water resistance.
Best Application Match Indoor décor, architectural accents, signage, façades, and wet-area outlines Select by environment first, then brightness, voltage, and control requirements A correct environmental rating and installation method are essential for safety, durability, and reliable performance.
Practical sizing rule: Total load (W) = strip length (m) × rated power (W/m). Select a power supply with the same output voltage and at least 20% reserve capacity. Actual specifications vary by LED density, color, silicone profile, ambient temperature, and installation method.

Verify Flexibility, Mounting Options, and Long-Term Durability

How to Choose the Right Neon LED Strip for Your Project?

Flexibility should match the shape of your installation. For tight curves, choose a strip with a small minimum bend radius. Never twist it sideways unless the manufacturer permits that movement. I have seen clean designs fail because installers forced the strip around sharp corners. Measure the curve before ordering. A flexible strip is useful, but excessive bending can damage internal wiring.

Tips:

Test a short sample first. Check its bend direction, brightness, and surface finish. Confirm that mounting clips fit securely. For long runs, inspect voltage drop near the far end. It may appear dimmer than the beginning. That detail is easy to miss.

Mounting options affect both appearance and service life. Clips provide strong support on uneven surfaces, while adhesive backing works better on smooth, clean panels. Outdoor projects need sealed connections, suitable ingress protection, and resistance to sunlight and temperature changes. Silicone housings usually protect the LEDs well, but they are not indestructible. Leave room for heat to escape, especially inside narrow channels. I once underestimated summer heat under a dark canopy; the lighting worked, but the housing aged faster than expected. Check the power supply rating, connector quality, and installation surface before final assembly. A careful test run is worth the extra hour.

Article Source: