How to Choose PV Accessories for Solar Projects
Choosing PV Accessories is not a minor purchasing task. These components connect, protect, support, and monitor the entire solar installation. A high-efficiency module can still underperform when its connectors, cables, or mounting hardware are poorly matched.
Solar design specialist Steven Strong has often emphasized a practical principle: “The best solar system is the one that continues to work safely for decades.” This idea should guide every accessory decision. Select connectors with compatible ratings, cables designed for ultraviolet exposure, and mounting systems suited to the roof structure. Check voltage, current, temperature, wind, and moisture conditions before approving any component.
A reliable project also needs suitable fuses, disconnects, surge protection, grounding equipment, and monitoring devices. Each item should match the inverter and array configuration. Certification marks matter, but they do not replace engineering judgment. A certified connector may still be unsuitable for a harsh coastal site.
Field experience reveals a common problem. Teams often compare purchase prices first, then discover higher maintenance costs later. A small saving on cable glands can create water ingress, loose connections, or repeated service visits. That is not efficient.
The selection process should include installation records, supplier documentation, warranty terms, and replacement availability. Test samples when possible. Inspect crimp quality and connector fit before large-scale deployment. We sometimes trust product labels too quickly. That mistake deserves more attention.
This guide explains how to evaluate PV Accessories with practical project conditions in mind. It focuses on compatibility, safety, durability, installation quality, and long-term value.
Define the Role of PV Accessories in a Solar Project
How to Choose PV Accessories for Solar Projects
Define the Role of PV Accessories in a Solar Project
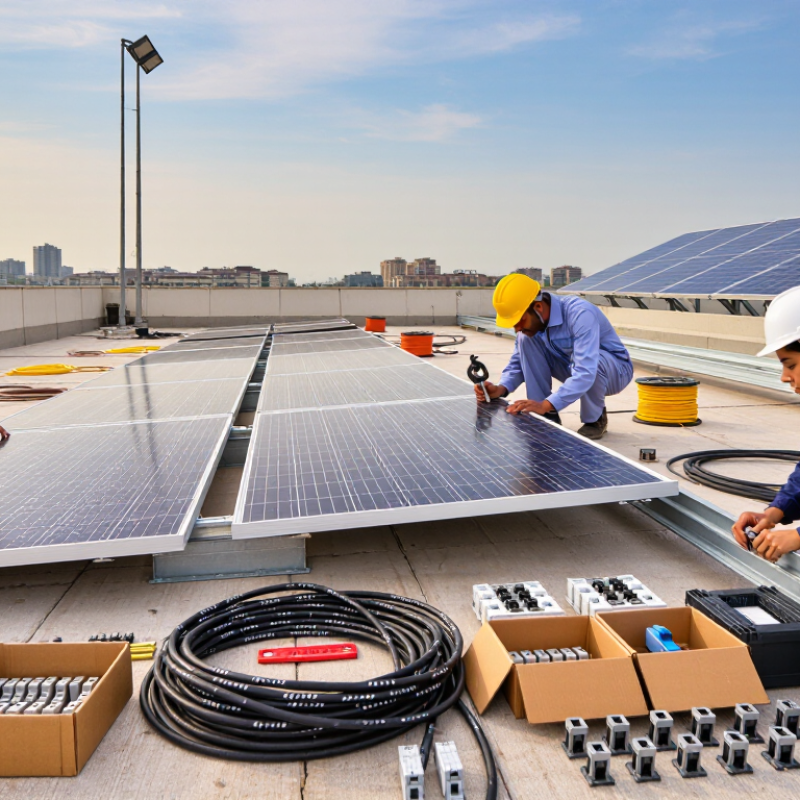
PV accessories connect, protect, and support the main solar equipment. They include mounting rails, cable connectors, junction boxes, grounding parts, fuses, and monitoring devices. Their role is practical, not decorative. A weak connector can create resistance, heat, and long-term energy loss. A poorly aligned rail can stress modules during strong wind.
During project planning, I check each accessory against voltage, current, cable size, roof material, and local weather. For example, a coastal installation needs corrosion-resistant hardware and sealed electrical enclosures. A snowy site may require stronger supports and different load calculations. These choices should follow applicable electrical and building standards. Installation records also help inspectors verify the system later.
Compatibility matters more than price alone. Connectors must match correctly, and cable paths should avoid sharp edges and standing water. Grounding components need continuous electrical contact, even after years of vibration. I have seen projects where accessories were selected late, forcing unnecessary drilling and cable extensions. That mistake costs time. It can also create hidden safety risks. I still recheck torque values, polarity, and enclosure seals before commissioning.
No checklist replaces careful field judgment. A small oversight may remain invisible until the first extreme-weather event.
Assess Site Conditions, System Design, and Energy Requirements
Choosing PV accessories starts with the site, not the product catalogue. Inspect roof pitch, shading, wind exposure, soil conditions, and cable routes. A coastal site may need stronger corrosion resistance, while a dusty farm installation may require sealed enclosures. Record temperature ranges carefully. Heat can reduce cable capacity and shorten component life.
Tips: Photograph every cable path and mounting surface. Measure distances, not guesses. Check local electrical requirements before selecting connectors, fuses, isolators, and surge protection. Small mismatches can create heat, maintenance delays, or unsafe faults. Keep an access route for inspection and cleaning.
System design should guide every accessory choice. Confirm module voltage, inverter limits, string length, expected current, and battery requirements where storage is included. Choose cable sizes for current, distance, voltage drop, and ambient temperature. Match mounting hardware to the roof structure, not only to panel dimensions. Energy requirements also matter. A household needing evening power may require storage, load management, or a larger inverter. For a commercial site, peak demand can influence protection and monitoring equipment. Field experience helps, but it is not enough. A spreadsheet can miss a shaded wall or a difficult service route. Recheck the design on site before ordering. Some early assumptions will be wrong. That is normal, if they are corrected before installation.
Select Compatible Cables, Connectors, Mounting, and Protection Devices
How to Choose PV Accessories for Solar Projects
Global solar capacity reached about 1,419 GW by the end of 2023, according to IRENA’s Renewable Capacity Statistics 2024. This scale makes accessory compatibility a reliability issue, not a minor purchasing detail. IEA PVPS reported over 407 GW of new photovoltaic capacity in 2023. Every cable, connector, and protection device must match the array’s voltage, current, temperature, and installation environment. Select cables certified for photovoltaic service, such as those meeting IEC 62930. Confirm their conductor size, insulation rating, bend radius, and resistance to ultraviolet exposure.
Connectors should use an approved, matching system. Similar-looking plugs are not automatically interchangeable. Check IEC 62852 compliance, contact materials, sealing performance, and the manufacturer’s crimping procedure. Small errors matter. An incomplete crimp can create heat inside a sealed connector. Mounting components need more than a convenient rail length. Verify wind load, snow load, roof condition, corrosion class, thermal movement, and bonding continuity against the project’s structural calculations. A neat layout can still fail under uplift.
Protection devices must reflect real operating conditions. Size fuses, disconnectors, and surge protective devices using maximum system voltage, short-circuit current, temperature correction, and fault-current coordination. IEC 61643-31 addresses photovoltaic DC surge protection. IEA PVPS reliability guidance also stresses inspection and preventive maintenance. That point is easy to underestimate. A commissioning checklist should record torque values, polarity, insulation resistance, connector engagement, and grounding results. Recheck assumptions when the site changes; the first design is not always the right one.
Verify Costs, Maintenance Needs, and Long-Term System Performance
How to Choose PV Accessories for Solar Projects
Accessory costs can quietly reshape a solar project’s budget. I compare the purchase price, installation time, replacement frequency, and transport requirements. A cheaper connector may require more labor or fail sooner. Request itemized quotations, technical datasheets, and written warranty conditions. Check whether prices include testing, delivery, spare parts, and protective packaging. Small omissions become expensive later.
Maintenance needs should be visible before installation. Inspect cable routes, mounting points, junction enclosures, and drainage areas during the design review. Choose accessories that allow safe access and simple replacement. Dust, salt, heat, and standing water can shorten service life. Keep inspection records with photographs and torque readings. A practical maintenance schedule is useful, but it should reflect the site, not a generic template.
Long-term performance depends on compatibility and stable materials. Confirm electrical ratings, temperature limits, ultraviolet resistance, and mechanical strength under local conditions. Measure early system output and compare it with expected production after commissioning. This creates a reliable baseline. I have seen projects focus heavily on initial savings and overlook cleaning access. That decision seemed efficient at first. It later increased labor costs and reduced inspection quality. Some assumptions will be wrong. Review them annually using failure records, energy data, and actual maintenance invoices.
How to Choose PV Accessories for Solar Projects
Compare indicative installed cost share, expected maintenance actions, and typical service life before selecting PV accessories. Values are planning benchmarks and should be verified against project conditions, local labor rates, environmental exposure, and supplier warranties.
Inverter equipment usually has the highest replacement risk because its typical service life is shorter than the PV modules and mounting structure. Cables, connectors, and mounting components generally require fewer interventions when correctly specified for temperature, UV exposure, moisture, wind, and corrosion conditions.